Here is a report of the Ray Tracer written by myself Christopher Chedeau. I've taken the file format and most of the examples from the Ray Tracer of our friends Maxime Mouial and Clément Bœsch. The source is available on Github.
It is powered by Open Source technologies: glMatrix, CodeMirror, CoffeeScript, Twitter Bootstrap, jQuery and Web Workers.
Check out the demo, or click on any of the images.
Objects
Our Ray Tracer supports 4 object types: Plane, Sphere, Cylinder and Cone.
The core idea of the Ray Tracer is to send rays that will be reflected on items. Given a ray (origin and direction), we need to know if it intersect an object on the scene, and if it does, how to get a ray' that will be reflected on the object.
Knowing that, we open up our high school math book and come up with all the following formulas.
Legend: Ray Origin \(O\), Ray Direction \(D\), Intersection Position \(O'\), Intersection Normal \(N\) and Item Radius \(r\).
| Intersection | Normal | |
|---|---|---|
| Plane | \[t = \frac{O_z}{D_z}\] | \[ N = \left\{ \begin{array}{l} x = 0 \\ y = 0 \\ z = -sign(D_z) \end{array} \right. \] |
| Sphere | \[ \begin{array}{l l l} & t^2 & (O \cdot O) \\ + & 2t & (O \cdot D) \\ + & & (O \cdot O) - r^2 \end{array} = 0\] |
\[ N = \left\{ \begin{array}{l} x = O'_x \\ y = O'_y \\ z = O'_z \end{array} \right. \] |
| Cylinder | \[ \begin{array}{l l l} & t^2 & (D_x D_x + D_y D_y) \\ + & 2t & (O_x D_x + O_y D_y) \\ + & & (O_x O_x + O_y O_y - r^2) \end{array} = 0\] |
\[ N = \left\{ \begin{array}{l} x = O'_x \\ y = O'_y \\ z = 0 \end{array} \right. \] |
| Cone | \[ \begin{array}{l l l} & t^2 & (D_x D_x + D_y D_y - r^2 D_z D_z) \\ + & 2t & (O_x D_x + O_y D_y - r^2 O_z D_z) \\ + & & (O_x O_x + O_y O_y - r^2 O_z O_z) \end{array} = 0\] |
\[ N = \left\{ \begin{array}{l} x = O'_x \\ y = O'_y \\ z = - O'_z * tan(r^2) \end{array} \right. \] |
In order to solve the equation \(at^2 + bt + c = 0\), we use
\[\Delta = b^2 - 4ac \]\[
\begin{array}{c c c}
\Delta \geq 0 & t_1 = \frac{-b - \sqrt{\Delta}}{2a} & t_2 = \frac{-b + \sqrt{\Delta}}{2a}
\end{array}
\]
And here is the formula for the reflected ray:
\[
\left\{
\begin{array}{l}
O' = O + tD + \varepsilon D' \\
D' = D - 2 (D \cdot N) * N
\end{array}
\right.
\]
In order to fight numerical precision errors, we are going to move the origin of the reflected point a little bit in the direction of the reflected ray (\(\varepsilon D'\)). It will avoid to falsely detect a collision with the current object.
Coordinates, Groups and Rotations
We want to move and rotate objects. In order to do that, we compute a transformation matrix (and it's inverse) for each object in the scene using the following code:
\[
T = \begin{array}{l}
(Identity * Translate_g * RotateX_g * RotateY_g * RotateZ_g) * \\
(Identity * Translate_i * RotateX_i * RotateY_i * RotateZ_i)
\end{array}
\]\[ I = T^{-1} \]
|
\[Translate(x, y, z) = \left(\begin{array}{c c c c} 1 & 0 & 0 & x \\ 0 & 1 & 0 & y \\ 0 & 0 & 1 & z \\ 0 & 0 & 0 & 1 \end{array}\right)\] |
\[RotateX(\alpha) = \left(\begin{array}{c c c c} 1 & 0 & 0 & 0 \\ 0 & cos(\alpha) & -sin(\alpha) & 0 \\ 0 & sin(\alpha) & cos(\alpha) & 0 \\ 0 & 0 & 0 & 1 \end{array}\right)\] |
|
\[RotateY(\alpha) = \left(\begin{array}{c c c c} cos(\alpha) & 0 & sin(\alpha) & 0 \\ 0 & 1 & 0 & 0 \\ -sin(\alpha) & 0 & cos(\alpha) & 0 \\ 0 & 0 & 0 & 1 \end{array}\right)\] |
\[RotateZ(\alpha) = \left(\begin{array}{c c c c} cos(\alpha) & -sin(\alpha) & 0 & 0 \\ sin(\alpha) & cos(\alpha) & 0 & 0 \\ 0 & 0 & 1 & 0 \\ 0 & 0 & 0 & 1 \end{array}\right)\] |
We have written the intersection and normal calculations in the object's coordinate system instead of the world's coordinate system. It makes them easier to write. We use the transformation matrix to do object -> world and the inverse matrix to do world -> object.
|
\[ \left\{\begin{array}{l} O_{world} = T * O_{object} \\ D_{world} = (T * D_{object}) - (T * 0_4) \end{array}\right. \] |
\[ \left\{\begin{array}{l} O_{object} = I * O_{world} \\ D_{object} = (I * D_{world}) - (I * 0_4) \end{array}\right. \] |
\[0_4 = \left(\begin{array}{c} 0 \\ 0 \\ 0 \\ 1 \end{array}\right) \] |
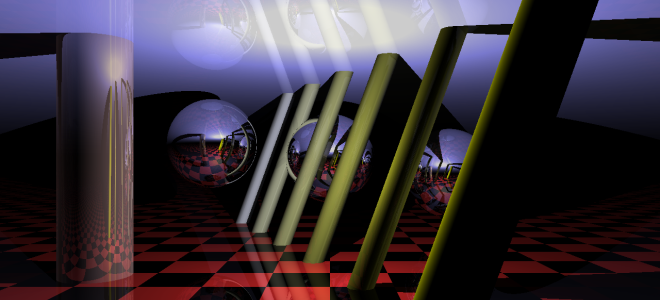
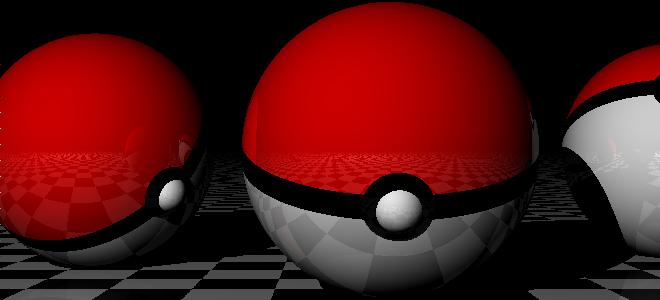
Bounding Box
The previous equations give us objects with infinite dimensions (except for the sphere) whereas objects in real life have finite dimensions. To simulate this, it is possible to provide two points that will form a bounding box around the object. On the intersection test, we are going to use the nearest point that is inside the bounding box.
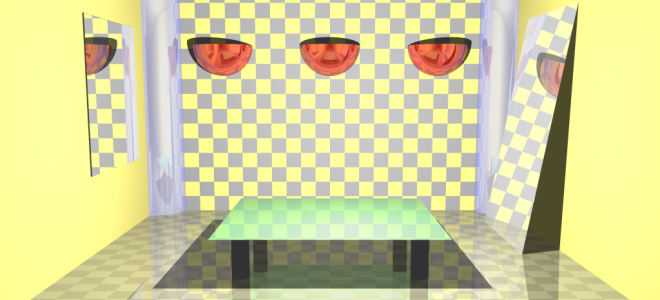
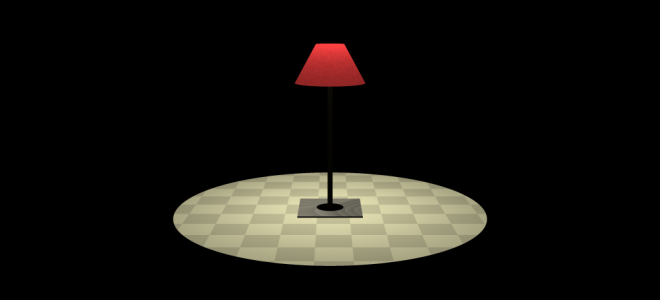
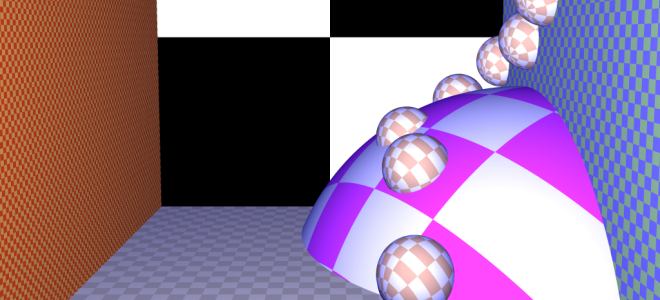
This gives us the ability to do various objects such as mirrors, table surface and legs, light bubbles and even a Pokeball!
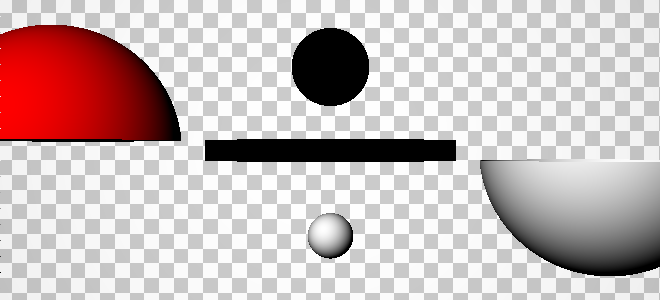
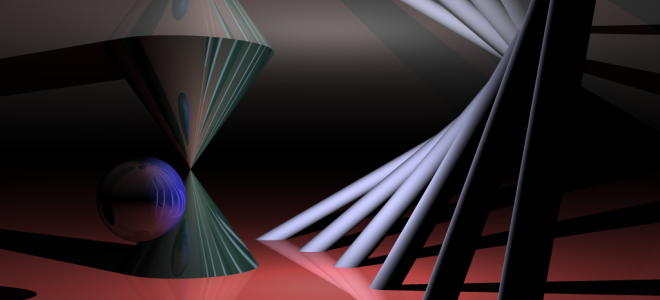
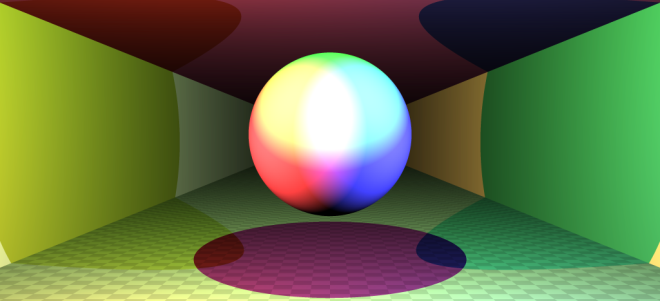
Light
An object is composed of an Intensity \(I_o\), a Color \(C_o\) and a Brightness \(B_o\). Each light has a Color \(C_l\) and there is an ambient color \(C_a\). Using all those properties, we can calculate the color of a point using the following formula:
\[
I_o * (C_o + B_o) * \left(C_a + \sum_{l}{(N \cdot D) * C_l}\right)
\]
Only the lights visible from the intersection point are used in the sum. In order to check this, we send a shadow ray from the intersection point to the light and see if it intersects any object.

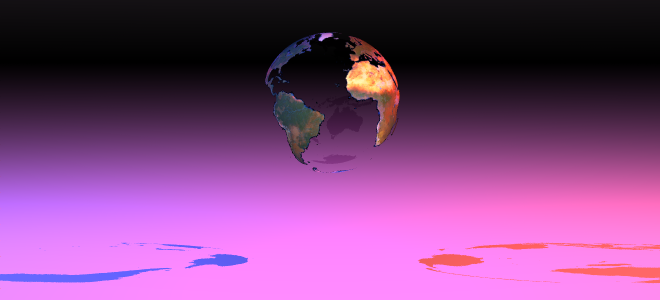
The following images are examples to demonstrate the lights.
Textures
In order to put a texture on an object, we need to map a point \((x, y, z)\) in the object's coordinate system into a point \((x, y)\) in the texture's coordinate system. For planes, it is straightforward, we just the \(z\) coordinate (which is equal to zero anyway). For spheres, cylinders and cones it is a bit more involved. Here is the formula where \(w\) and \(h\) are the width and height of the texture.
\[
\begin{array}{c c}
\phi = acos(\frac{O'_y}{r}) & \theta = \frac{acos\left(\frac{O'_x}{r * sin(\phi)}\right)}{2\pi}
\end{array}
\]\[
\begin{array}{c c}
x = w * \left\{\begin{array}{l l} \theta & \text{if } O'_x < 0 \\
1 - \theta & \text{else}\end{array}\right. & y = h * \frac{\phi}{\pi}
\end{array}
\]
Once we have the texture coordinates, we can easily create a checkerboard or put a texture. We added options such as scaling and repeat in order to control how the texture is placed.
We also support the alpha mask in order to make a color from a texture transparent.
Progressive Rendering
Ray tracing is a slow technique. At first, I generated pixels line by line, but I found out that the first few lines do not hold much information.
Instead, what we want to do is to have a fast overview of the scene and then improve on the details. In order to do that, during the first iteration we are only generating 1 pixel for a 32x32 square. Then we generate 1 pixel for a 16x16 square and so on ... We generate the top-left pixel and fill all the unknown pixels with it.
In order not to regenerate pixels we already seen, I came up with a condition to know if a pixel has already been generated. \(size\) is the current square size (32, 16, ...).
\[\left\{\begin{array}{l}
x \equiv 0 \pmod{size * 2}\\
y \equiv 0 \pmod{size * 2}
\end{array}\right.
\]
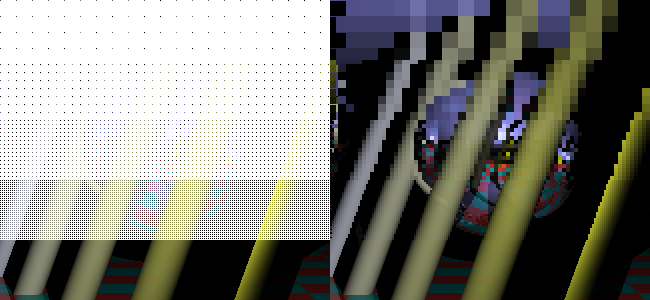
Supersampling
Aliasing is a problem with Ray Tracing and we solve this issue using supersampling. Basically, we send more than one ray for each pixel. We have to chose representative points from a square. There are multiple strategies: in the middle, in a grid or random. Check the result of various combinations in the following image:
- 1x: Basic
- 4x: 4 random 1 fixed, 3 random 2x upscale
- 16x: 4x upscale 2x upscale, 1 fixed, 3 random
Perlin Noise
We can generate random textures using Perlin Noise. We can control several parameters such as \(octaves\), the number of basic noise, the initial scale \(f\) and the factor of contribution \(p\) of the high frequency noises.
\[ noise(x, y, z) = \sum_{i = 0}^{octaves}{p^i * PerlinNoise(\frac{2^i}{f}x, \frac{2^i}{f}y, \frac{2^i}{f}z)} \]
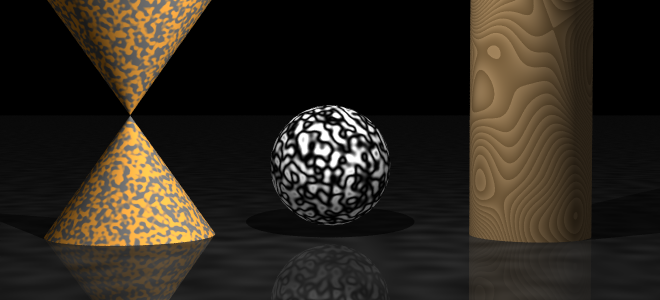
| \[noise\] | \[noise * 20 - \lfloor noise * 20 \rfloor\] | \[\frac{cos(noise) + 1}{2}\] |
As seen in the example, we can apply additional functions after the noise has been generated to make interesting effects.
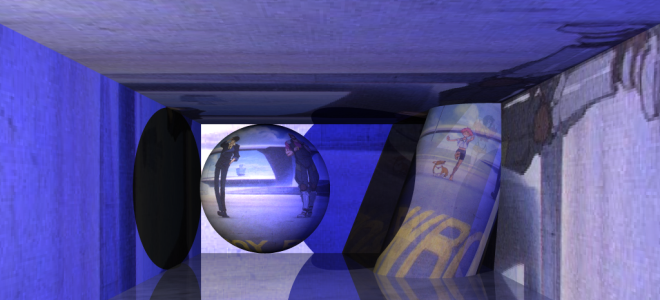
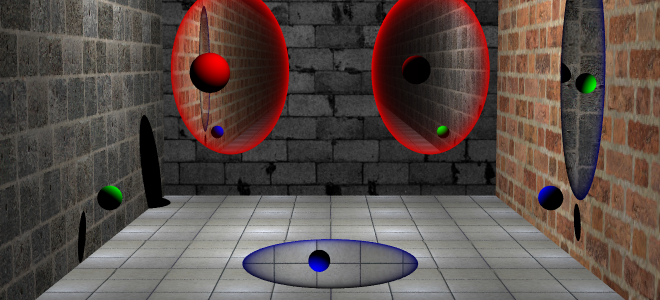
Portal
Last but not least, Portals from the self-titled game. They are easy to reproduce in a Ray Tracer and yet, I haven't seen any done.
If a ray enters portal A, it will go out from portal B. It is trivial to implement it, it is just a coordinates system transformation. Like we did for world and object transformation, we do it between A and B using their transformation matrix.
|
\[ \left\{\begin{array}{l} O_{a}' = T * O_{b} \\ D_{a}' = (T * D_{b}) - (T * 0_4) \end{array}\right. \] |
\[ \left\{\begin{array}{l} O_{b}' = T * O_{a} \\ D_{b}' = (T * D_{a}) - (T * 0_4) \end{array}\right. \] |
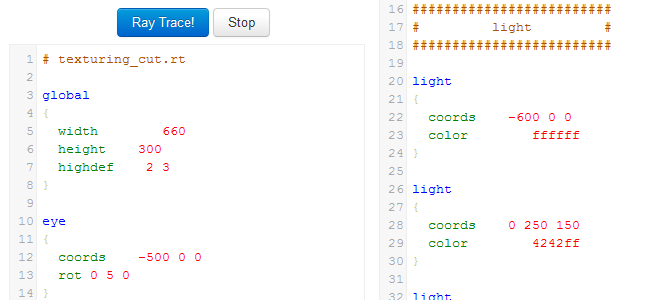
Scene Editor
In order to create scenes more easily, we have defined a scene description language. We developed a basic CodeMirror syntax highlighting script. Just enter write your scene down and press Ray Trace 🙂