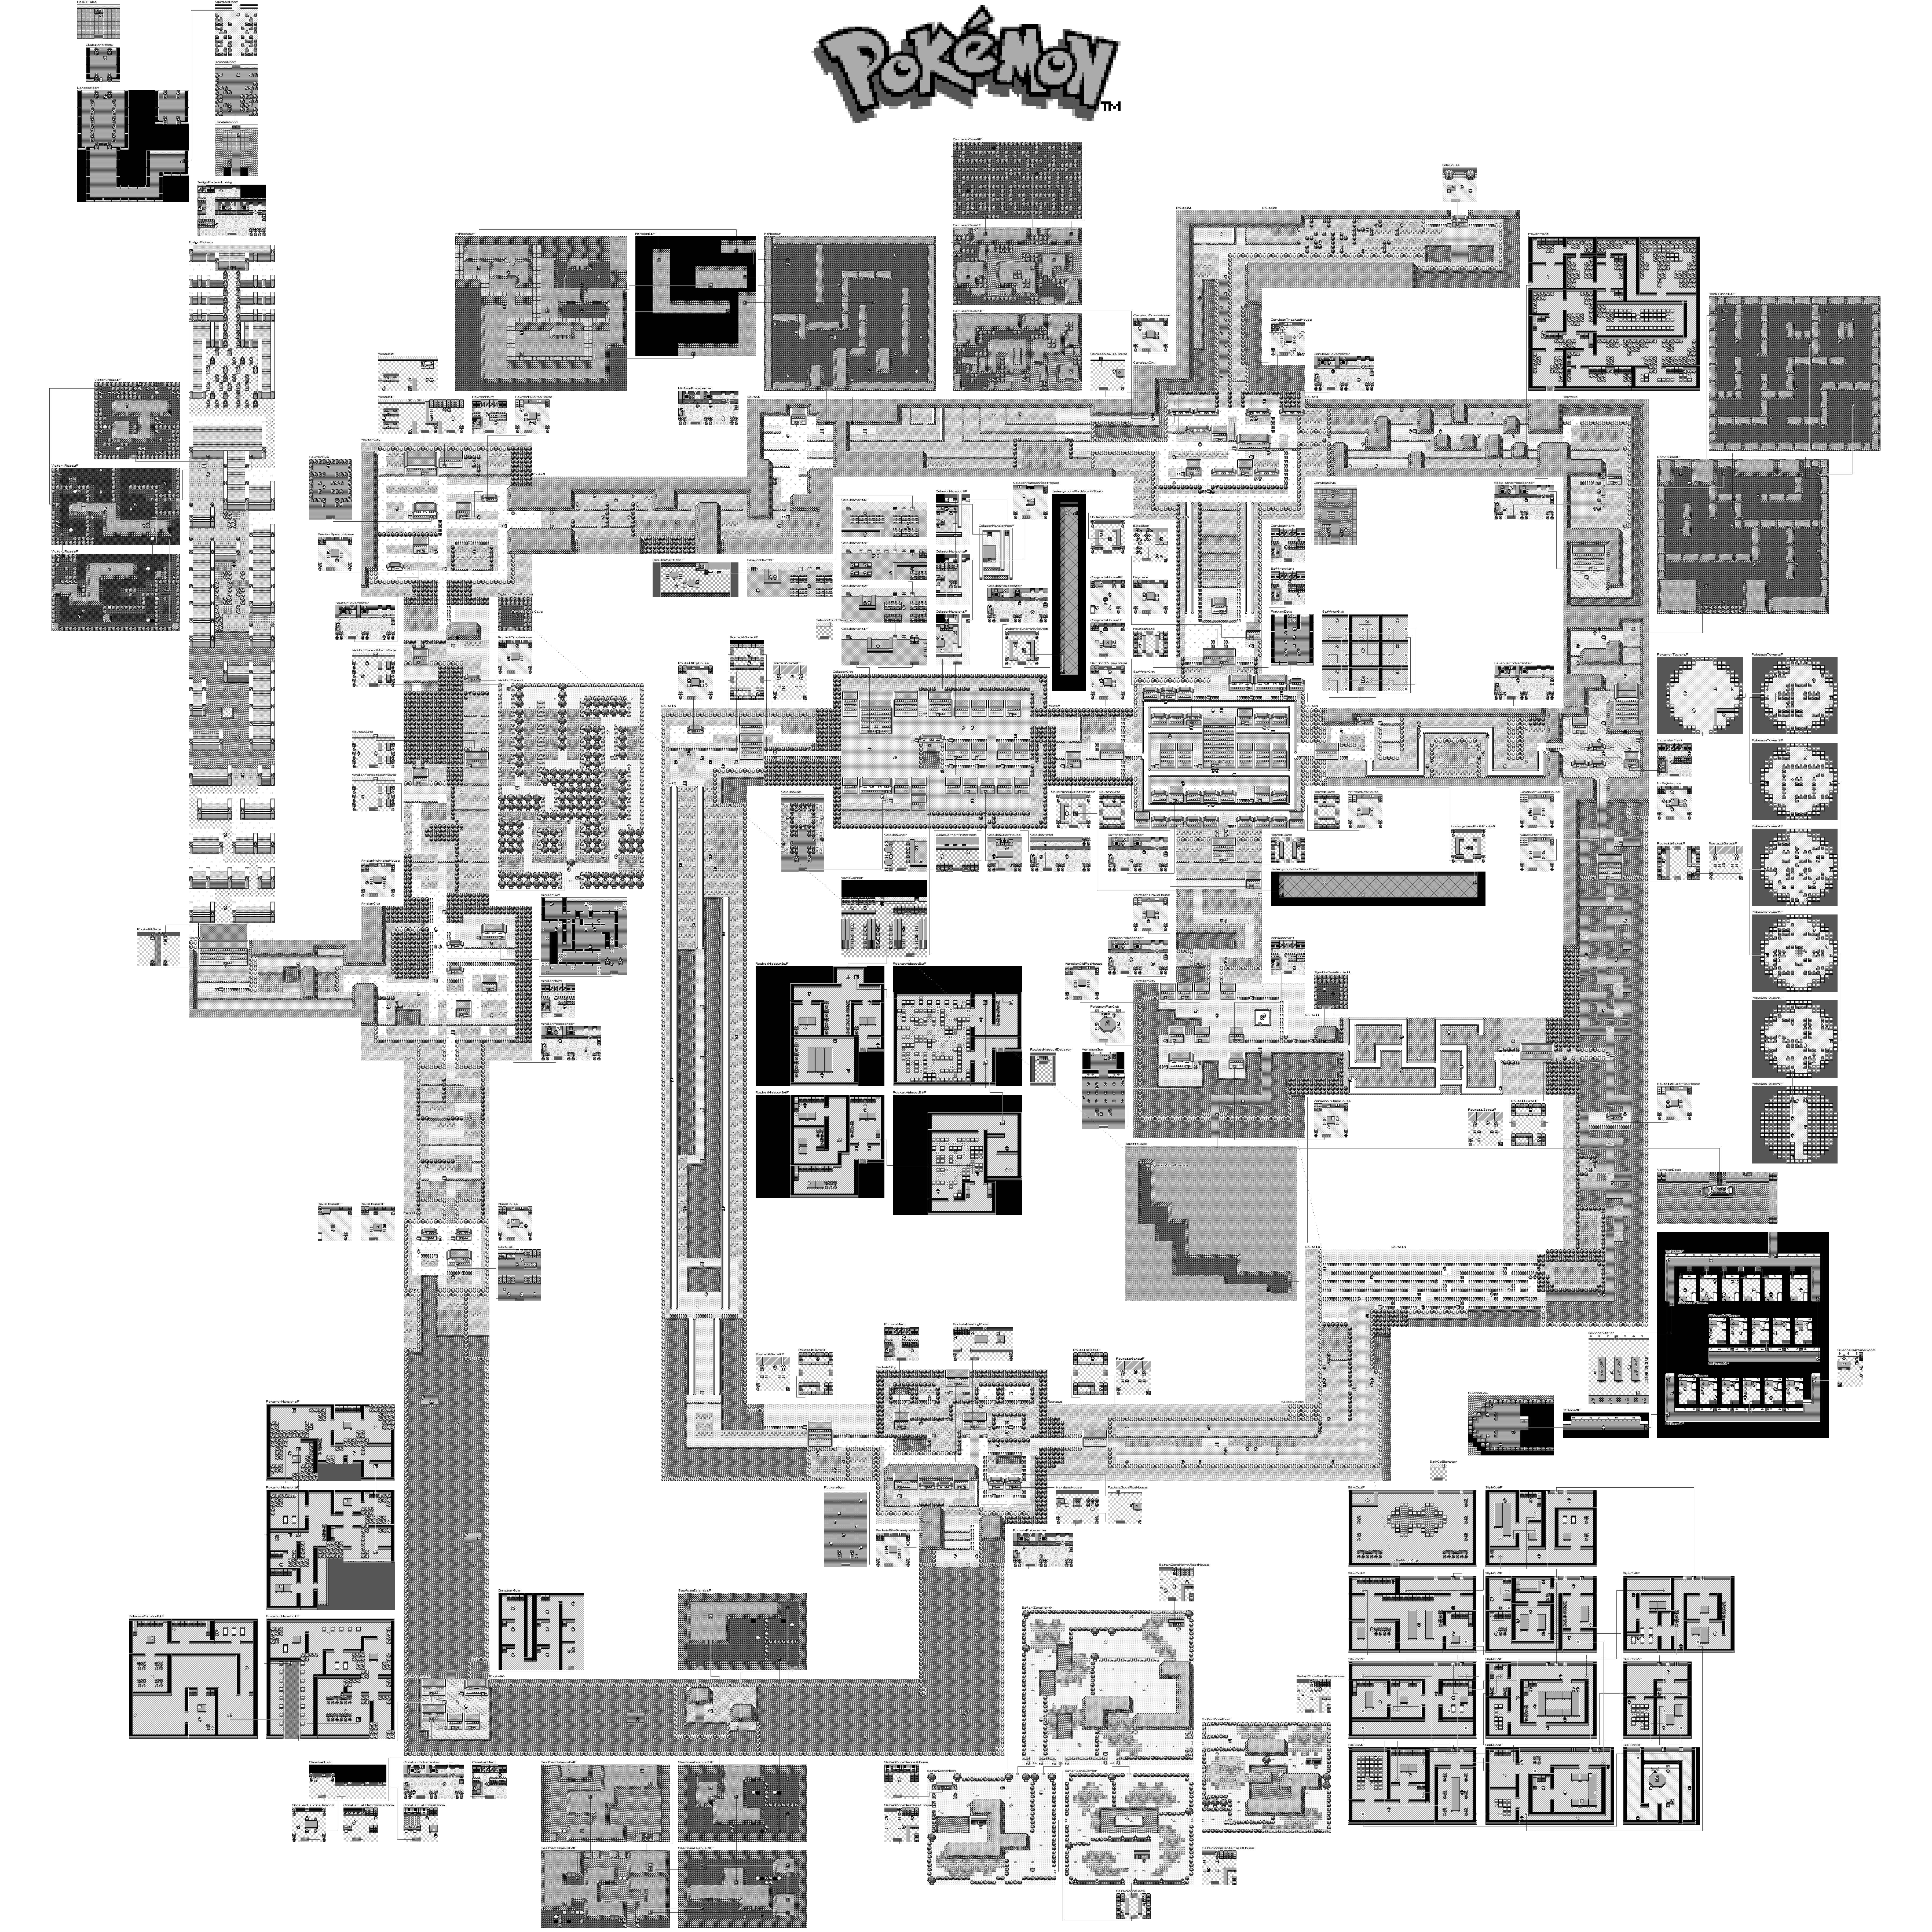
I randomly stumbled upon Peter Hajas rendering of Pallet Town and got super excited. I played Pokemon Red/Blue when it was released as a kid and played it again with my daughter when she was the same age. This game is really awesome and stood the test of time.
But, I've been very frustrated that I've never seen a proper map of the entire game. All the ones I've seen are just of the overworld but don't contain all the inside of buildings or caves, which is where you end up spending a lot of your time.
So, I spent the last month working on a full rendering of the map. And it's done just in time for Christmas 🙂 I used a lot of algorithms in the process and figured that you may be interested in it. This is the final 7200x7200 map, click to see the full version or run it yourself!
Overworld
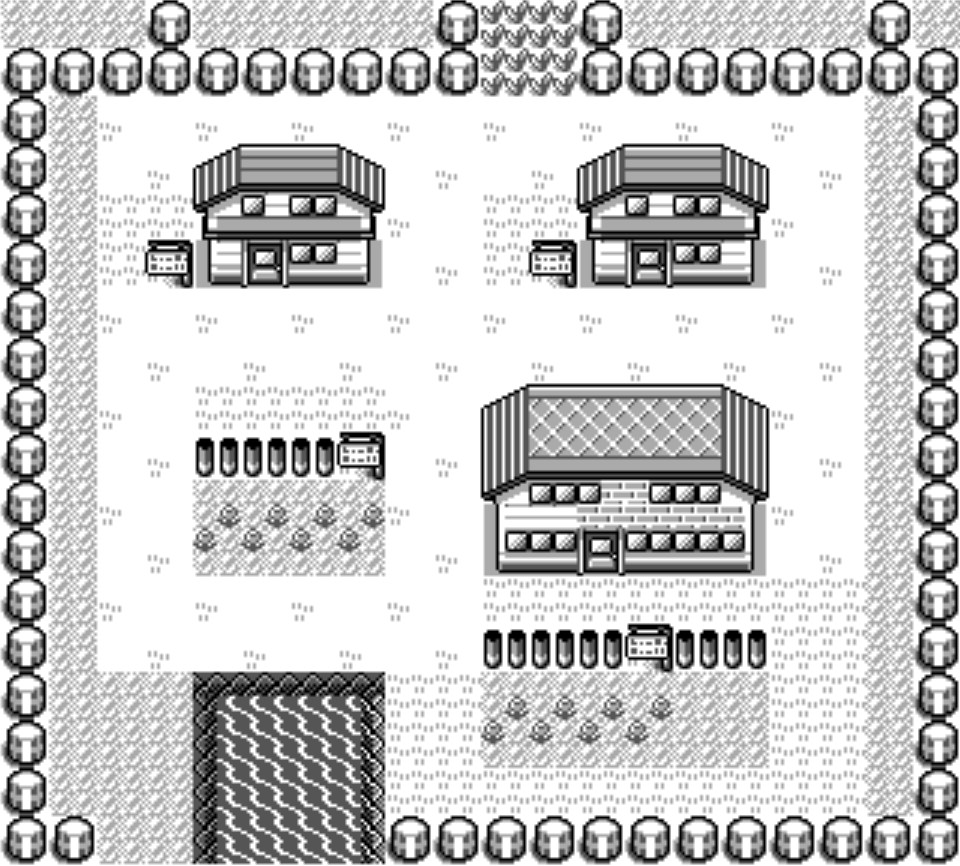
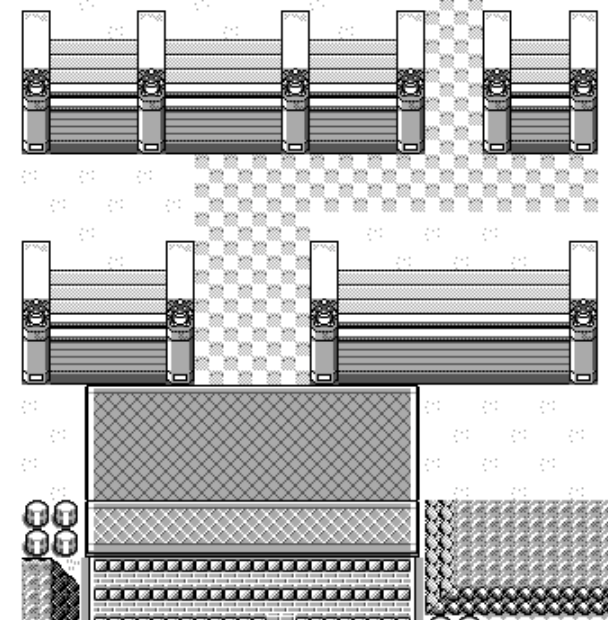
We need to start by rendering a single map of the game. For this, I used Peter Hajas's awesome explanations along with the awesome disassembly of the pokemon game: the pret/pokered project. I got Pallet Town rendered!
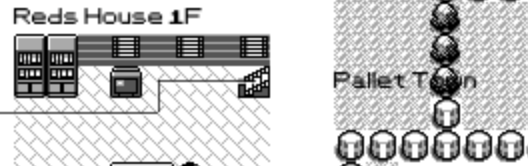
A single map is nice but you want to see the next map going to the edge. For this, the information is stored in headers files, one for each map. It contains the connections with other maps. In this case, north is Route 1 and south is Route 21.
// pokered/data/maps/headers/PalletTown.asm map_header PalletTown, PALLET_TOWN, OVERWORLD, NORTH | SOUTH connection north, Route1, ROUTE_1, 0 connection south, Route21, ROUTE_21, 0 end_map_header |
You can now recurse and display all of Kanto's overworld with it. The loop looks something like this where we keep a visited object with all the map names and whenever we visit a map, we add the connections to the todos list. Note that I keep a fail safe with Object.keys(visited).length < 100 to avoid going into infinite recursion if I make a mistake.
const todos = [{ mapName: "PalletTown", pos: {x: 0, y: 0} }]; const visited = {}; while (todos.length > 0 && Object.keys(visited).length < 100) { const mapTodo = todos.pop(); if (visited[mapTodo.mapName]) { continue; } visited[mapTodo.mapName] = true; drawMap(mapTodo); const metadata = getMapMetadata(mapTodo.mapName); metadata.connections.forEach((connection) => { if (visited[connection.mapName]) { return; } todo.push({mapName: connection.mapName, pos: computePosition(...)}); }); } |
This is the map that I was familiar with from playing the game! But if you have a good eye, you'll notice that the route leading to the elite four is all nonsense. What gives?
The problem is that we hardcoded a single tileset, the overworld one. But route 23 leading to Indigo Plateau has a different one "plateau".
We now run into an issue that's related to the browser, while we were able to use the deprecated synchronous XHR call to load all the map files, in order to draw the images to the canvas, there aren't any synchronous APIs available.
In order to fix this, we split the rendering into 4 parts: going through all the data to generate a list of draw calls. Then, we can parse that list to find all the images we need and load them, and finally once they are all loaded we can do the rendering pass.
// Phase 1: Push all the draw calls to an array drawCalls.push({ type: "tile", tilesetName: "overworld" | "plateau", ... }); // Phase 2: Extract all the images const tilesetNames = {}; drawCalls.forEach((drawCall) => { if (drawCall.type === "tile") { tilesetNames[drawCall.tilesetName] = true; } }); // Phase 3: Load the images const tilesetImages = {}; Promise.all([ ...Object.keys(tilesetNames).map((tilesetName) => { return new Promise((cb, raise) => { const image = document.createElement("img"); image.onload = () => { tilesetImages[tilesetName] = image; cb(); }; image.src = tilesets[tilesetName]; }); }), ]).then(() => { // Phase 4: Execute the canvas operations drawCalls.forEach((drawCall) => { if (drawCall.type === "tile") { context.drawImage( tilesetImages[drawCall.tilesetName], ... ); } }); }); |
And with this, we solved not only tilesets but all the images we'll need to include in the future. And, the route to Indigo Plateau doesn't look like a mess anymore.
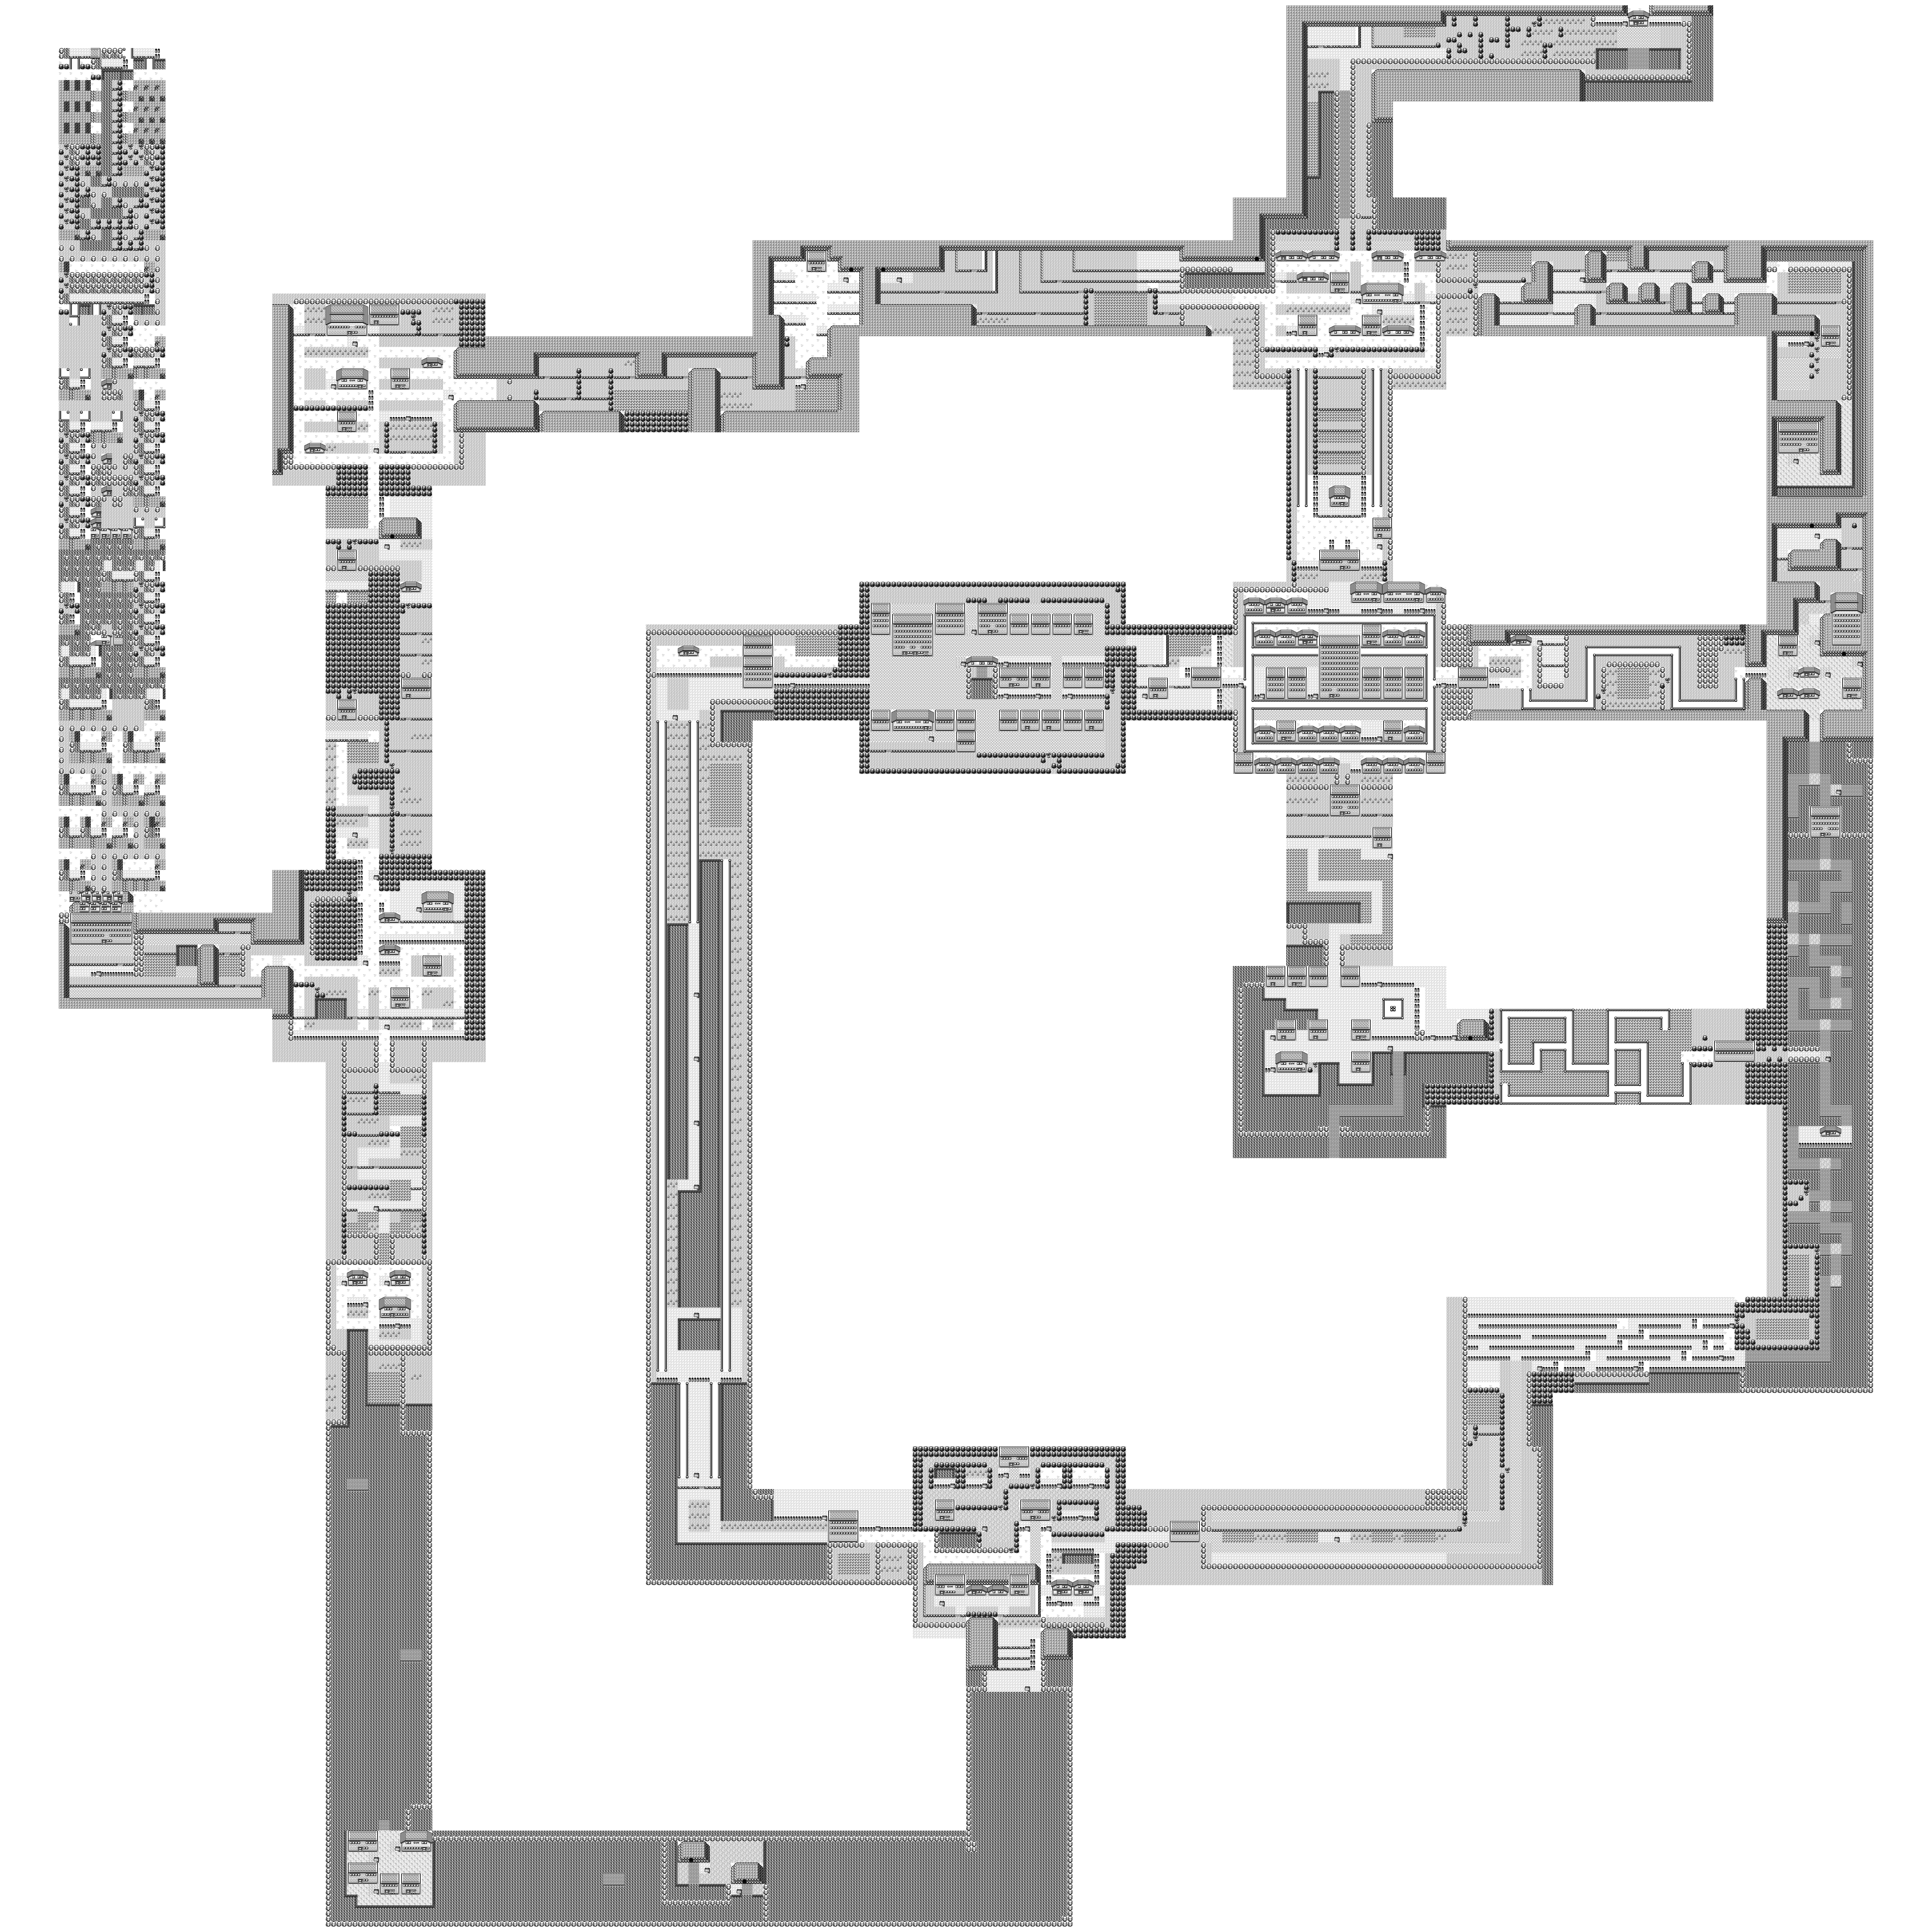
Connected Maps
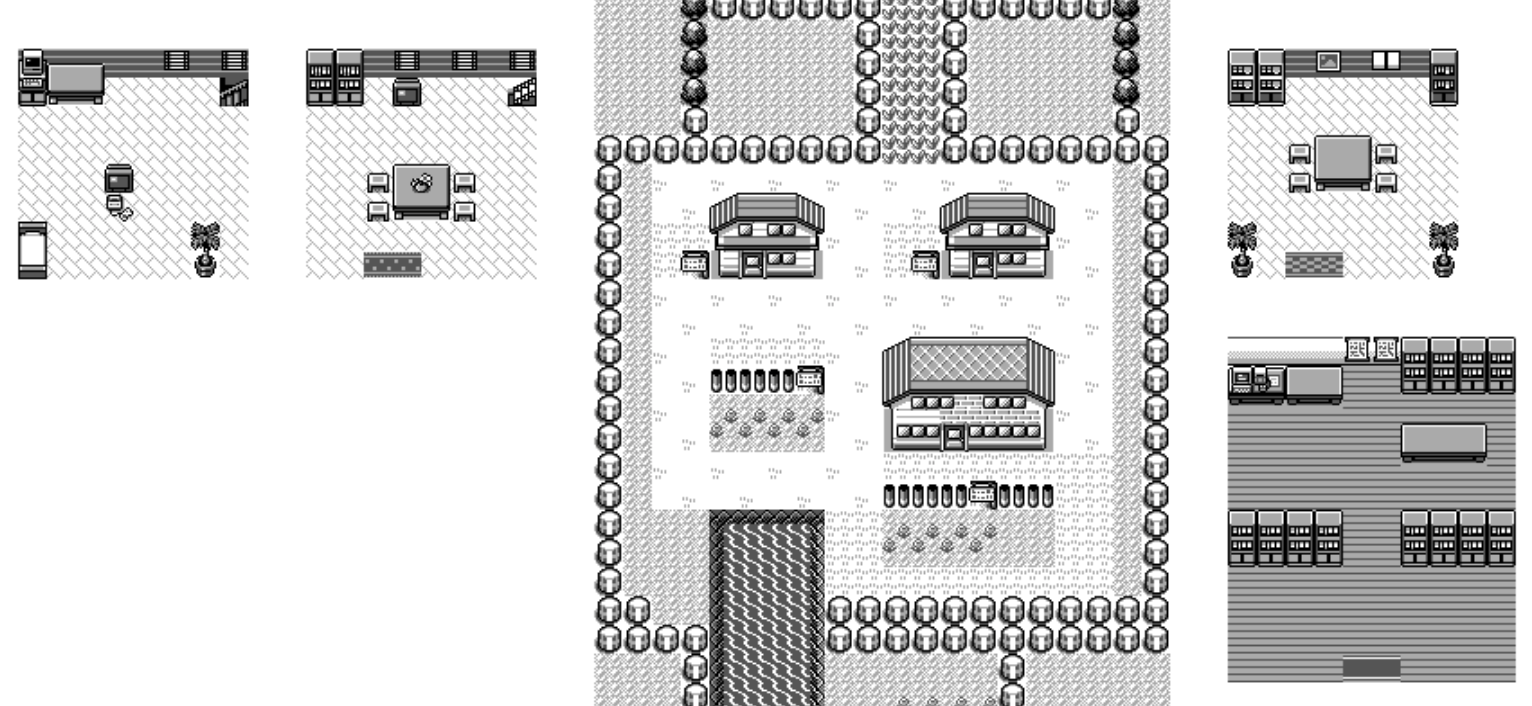
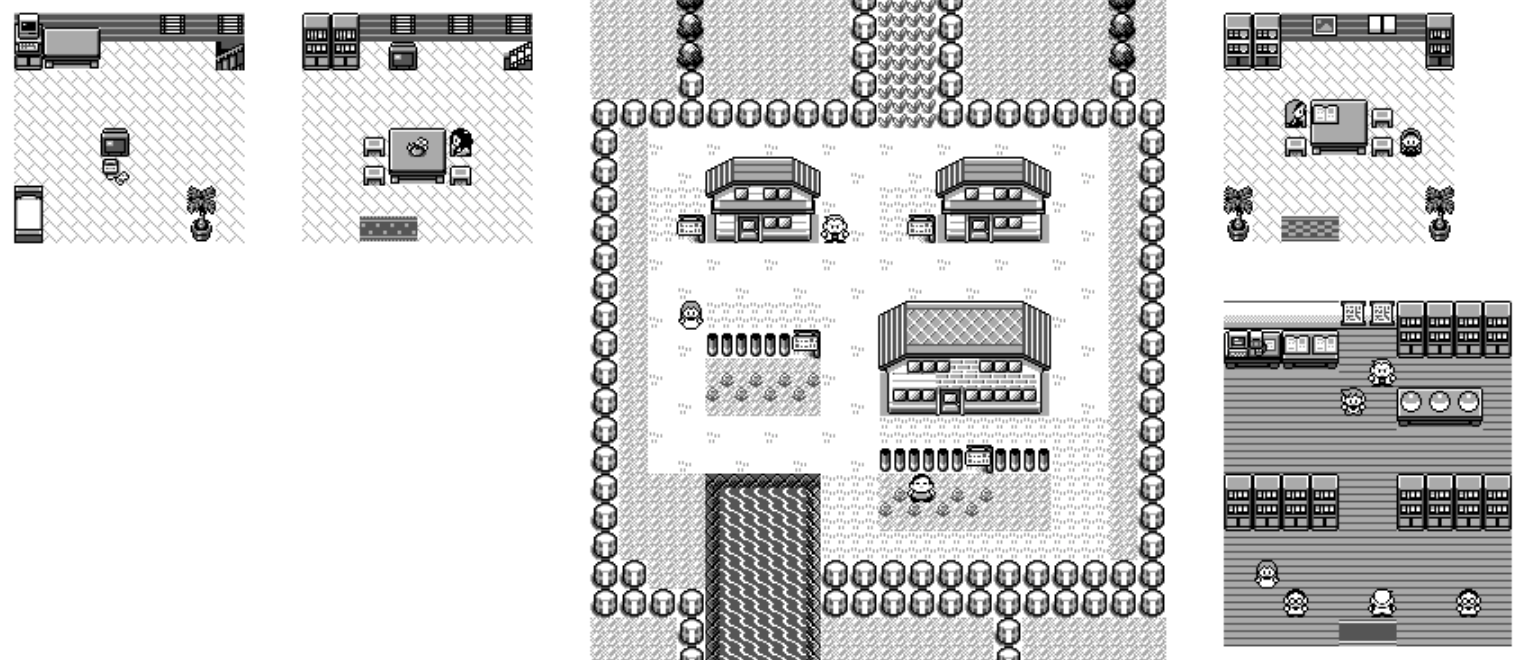
At this point we got what you can see in most full pokemon maps, but I really want to get all the houses, caves, safari zone... to show up!
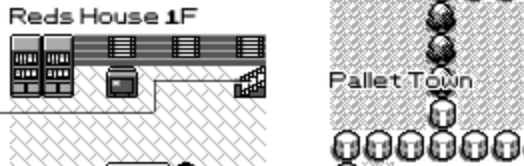
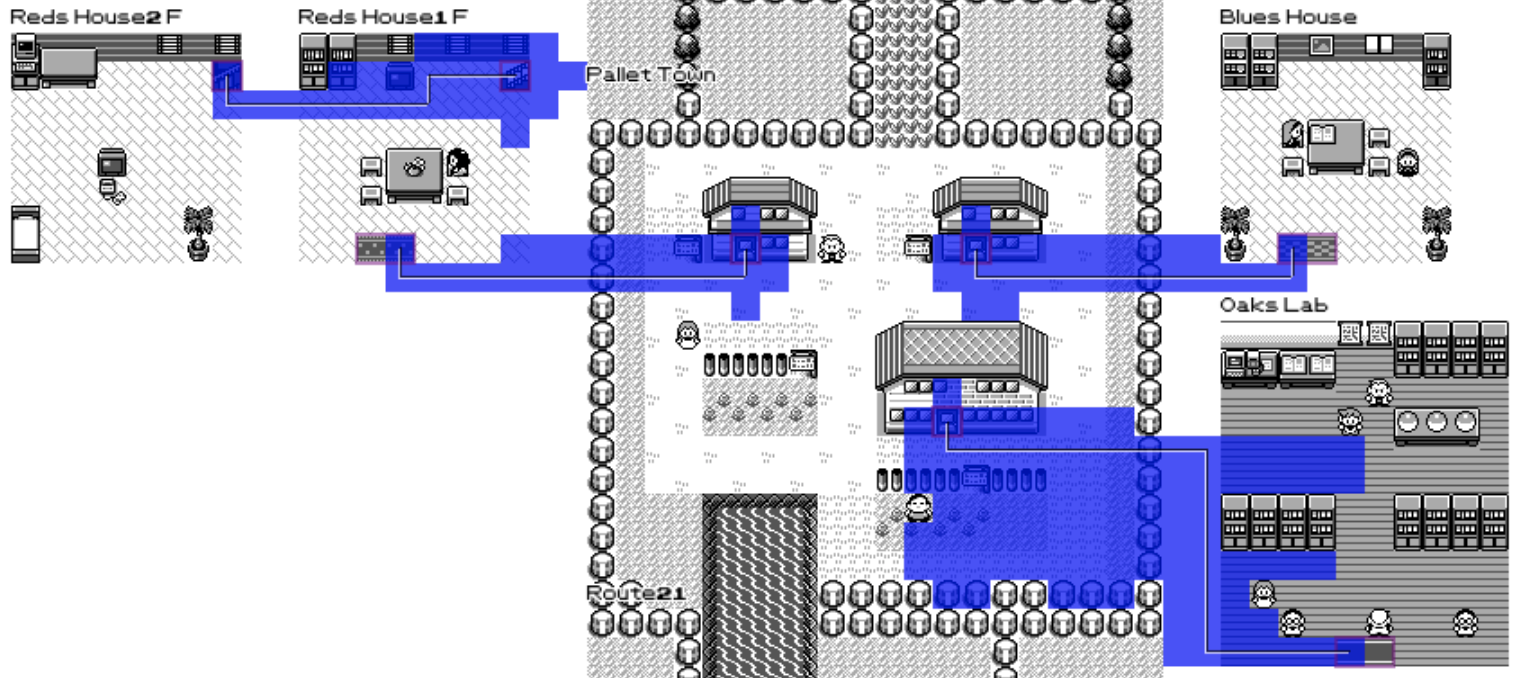
The way to think about the problem is that when you enter the player's house via the door (in blue), you get warped to the mat in the room (in red).
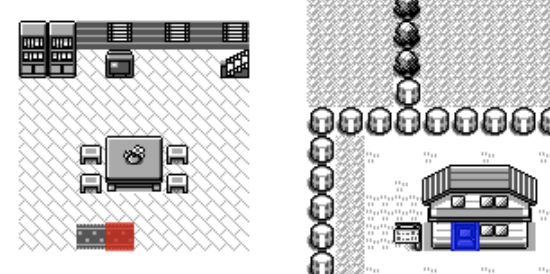
So the idea is that we're going to try and overlap the rendering of the inside of the house such that the door and the mat are on-top of each other. This will give us the coordinate at which we're going to draw the map (in green).

And we are going in a circle around that starting location until we find a position that is not going to collide with anything.
You may wonder why I only do an attempt every 4 positions... well, the truth is, I used the map coordinates but didn't realize that the game is actually fitting 4 tiles per block. But, it turns out to be very useful in practice to leave such gaps to draw arrows down the line.
There is probably an algorithm to visit cells in a grid going out in a circle but I couldn't find an easy way to write it myself. So instead I used a shortest path algorithm. I use a priority queue that picks the smallest distance from the center (note, you can use Math.hypot to do it!) and abuse objects in JavaScript by having coordinates as keys as string "12:4" and value of true to indicate that we already visited it.
const queue = new PriorityQueue((a, b) => Math.hypot(a.x - x, a.y - y) < Math.hypot(b.x - x, b.y - y) ); const visited = {}; let x = map.x + Math.floor(warp.x / 2); let y = map.y + Math.floor(warp.y / 2); queue.push({x, y}); visited[x + ":" + y] = true; const deltaX = Math.floor(nextWarp.x / 2); const deltaY = Math.floor(nextWarp.y / 2); while (!queue.isEmpty()) { const pos = queue.pop(); if (isEmpty(pos.x - deltaX, pos.y - deltaY)) { return { x: pos.x - deltaX, y: pos.y - deltaY, }; } for (let p of [ [{x: pos.x - 1, y: pos.y}], [{x: pos.x + 1, y: pos.y}], [{x: pos.x, y: pos.y - 1}], [{x: pos.x, y: pos.y + 1}], ]) { if (!visited[p.x + ":" + p.y]) { queue.push([p.x, p.y]); visited[p.x + ":" + p.y] = true; } } } |
The isEmpty function is just a double loop that checks if all the slots in the map are empty. You may realize that this is a O(n^3) algorithm but I have a trick to make it faster. I first do a check to see if the four corners are empty. Given the way all the maps are layout, in practice this heuristic is really close to perfect, so we are no longer quadratic.
Now, we can repeat this algorithm for every single warp point and we can draw all the sub-maps of the game close-ish to where the warp points are! The following is how Pallet Town is rendered using this technique.
This is called a "greedy" algorithm, where the first map that we place is placed forever and then the next maps have to find a position that would work. But this is not generating optimal layout where knowing the next maps we need to place, we could move the first one in a better position.
Sadly, those algorithms are a lot more expensive to run and also it's unclear whether it would find solutions that would be significantly more aesthetically pleasing. As a result, I ended up manually repositioning around half the maps. Having a base algorithm to work with was still extremely useful as I would just have to do touch ups instead of having to do everything from scratch
Sprite rendering
The pokered repository has for each map the location of all the sprites and has already done the work of converting compressed pixels to png.

If it was as simple, I would have not written a section on it but there were two complications.
The first one was around colors. For a mysterious reason, they didn't generate PNG with transparency, but instead used white for the transparent color. But you can notice that the face of that person should be rendered as pure white. What they ended up doing is to remap all the colors from [0-255] to [0-127] and keep white (255) as transparent.
One of the sadness of using the browser for doing this kind of work is that the APIs for image manipulation are extremely verbose. This is what it takes to remap the colors and handle transparency:
const image = document.createElement("img"); image.crossOrigin = "Anonymous"; image.onload = () => { const canvas = document.createElement("canvas"); canvas.width = image.width; canvas.height = image.height; const context = canvas.getContext("2d"); context.drawImage(image, 0, 0); const imageData = context.getImageData(0, 0, canvas.width, canvas.height); for (let i = 0; i < canvas.width; ++i) { for (let j = 0; j < canvas.height; ++j) { const offset = (i * canvas.height + j) * 4; if ( imageData.data[offset] === 255 && imageData.data[offset + 1] === 255 && imageData.data[offset + 2] === 255 ) { imageData.data[offset + 3] = 0; } else { imageData.data[offset + 0] *= 2; imageData.data[offset + 1] *= 2; imageData.data[offset + 2] *= 2; imageData.data[offset + 3] = 255; } } } context.putImageData(imageData, 0, 0); spriteImages[capitalSpriteName] = canvas; cb(); }; image.src = gfx_sprites[data_sprites[capitalSpriteName].name]; |
The other problem is that for saving space, only the drawing of the character looking left is stored. In order to render the one looking right, you need to swap the image. I could go and write code to swap each pixel individually but you can also use the transform properties translate and scale of the canvas element to make it easier.
const newCanvas = document.createElement("canvas"); newCanvas.width = spriteImage.width; newCanvas.height = spriteImage.height; const newContext = newCanvas.getContext("2d"); newContext.translate(newCanvas.width, 0); newContext.scale(-1, 1); newContext.drawImage(spriteImage, 0, 0); spriteImage = newCanvas; |
And, we now have life in our world! We now render all the characters and the three initial pokeballs to chose from.
Text
All the maps have a descriptive name. I figured that I would display them in the top left. I could have used the images for the text but I decided to be lazy and use the PKMN RGBY font instead.
It worked great except for maps in the overworld, where it would be drawn on-top of the map connected on-top and not be legible. For this, I used a trick to render the same text many time, first in white to do the outline with a small displacement each time and finally in black.
The code for this is pretty neat:
context.font = "9px PKMN"; context.fillStyle = "white"; for (let p of [ [-1, -1], [-1, 0], [-1, 1], [0, -1], [0, 0], [0, 1], [1, -1], [1, 0], [1, 1], ]) { context.fillText( drawCall.name, drawCall.x + p[0], drawCall.y + p[1] ); } context.fillStyle = "black"; context.fillText( drawCall.name, drawCall.x + leftAdjustment, drawCall.y + topAdjustment ); |
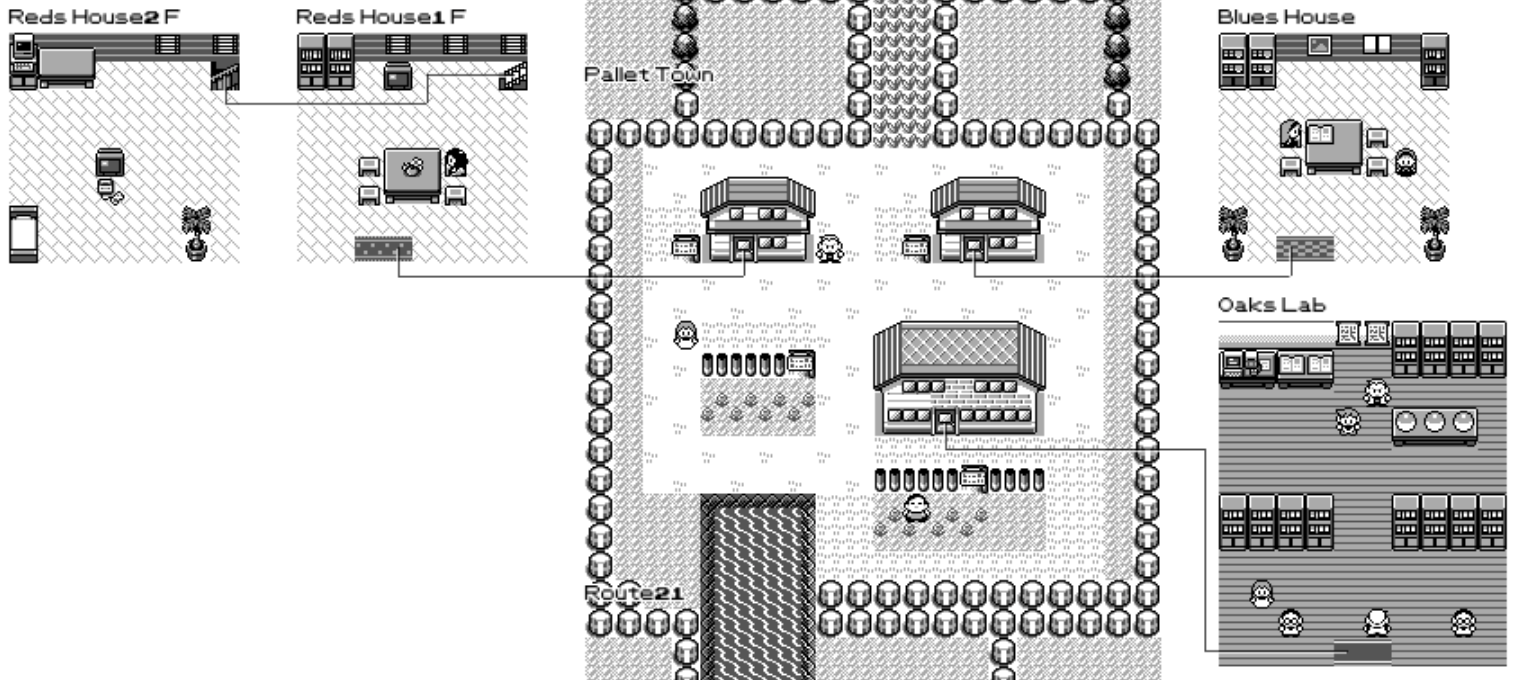
Line Connections
While we display all the maps you can go to, it's not very clear how maps are connected.
In practice, we have a lot of data to deal with: we have a connection from the door to one of the square of the mat. And then each square of the mat is connected to the door. So that's 3 arrows we could draw for each of the connections.
The first step we need to do is to simplify this and group warp zones together and instead of having two directions, only store one between two zones. When there are multiple choices, we draw between the two closest points from the two groups.
I wasn't really satisfied with the way those lines where drawn. Pokemon is all about grids but those diagonal lines break the immersion. I also wasn't happy about the lines going over objects in the world. For example between the two floors of Red's house, you can see the line going through the TV.
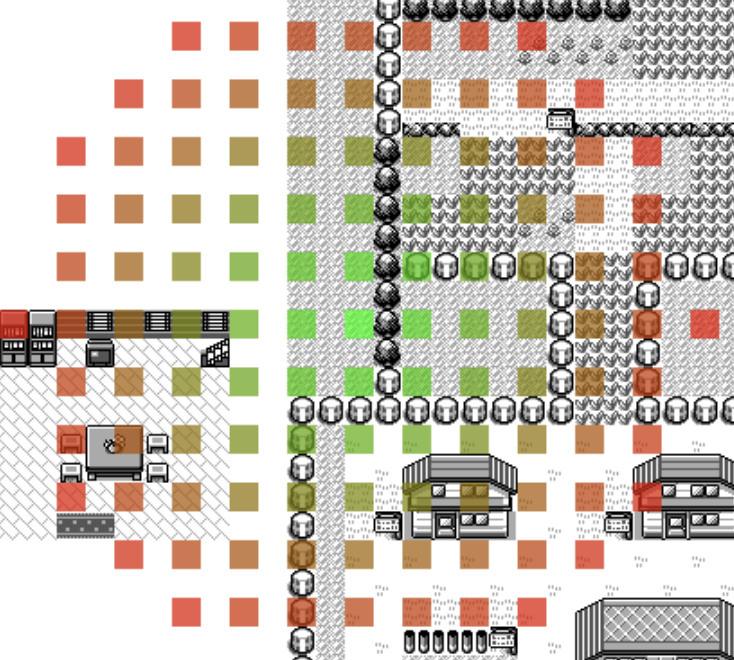
The main idea is to use a shortest path algorithm to go from the two ends of the connection. We only let it move in horizontal and vertical steps. And each tile has a different cost. The whitespace around the maps is very cheap, the tiles walkable in-game cost a bit more. At the other end we want to avoid lines crossing over map names, sprites and warp points.
If we draw the same scene with the costs attached to various tiles we get the following:

const COST_WARP = 10; const COST_SPRITE = 4; const COST_MAP_NAME = 2.0; const COST_ARROW = 1.9; const COST_MAP = 1.2; const COST_MAP_WALKABLE = 0.6; const COST_VOID = 0.5; const COST_TURN_MALUS = 0.2; |
The next step is to use A* shortest path algorithm in order to find where to draw the lines. I highlighted all the tiles that the algorithm visited trying to find the shortest path.
And, we got ourselves lines that I'm happy with!
The A* algorithm is a bit too verbose to print here but you can look at the source code if you're interested in reading it.
Miscelaneous
The process of building the map from there on was to look through every part of the map, writing down what felt suboptimal, fixing it and repeat until everything looks just great. Here are some of the things I've had to do:
I always forget where hidden items are located, so I draw semi-transparent pokeballs at their locations, both for normal items and game corner coins.
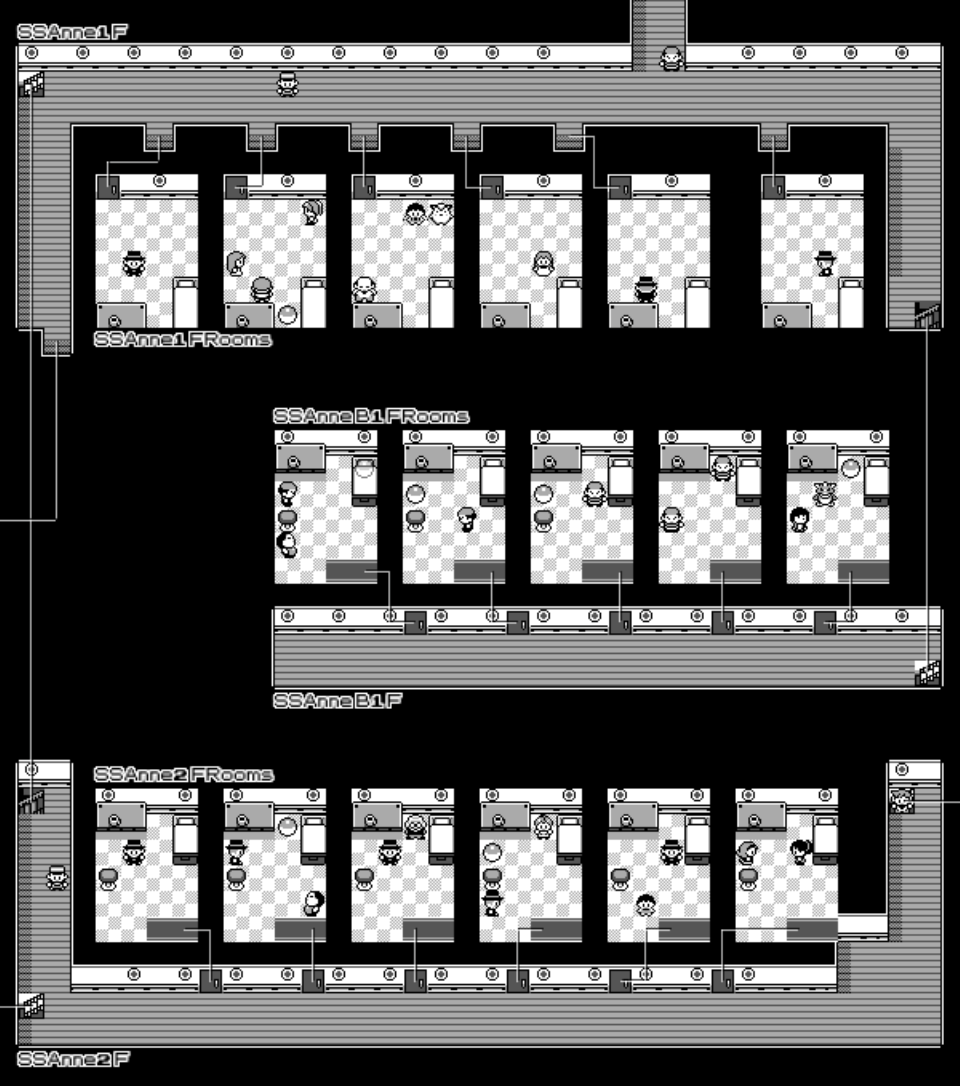
The SS Anne rooms are all separated into different maps. I spent time splitting each section of the map (which requires adjusting coordinates for the tiles to be rendered, warp zones for the connections, sprites and map name) and putting them in their corresponding location on the ship.
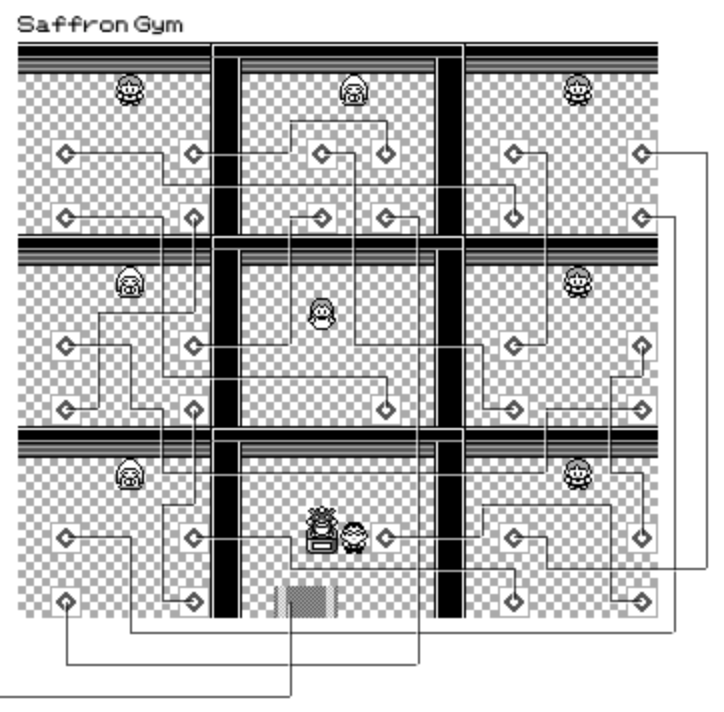
Sabrina's gym puzzle where each section has 4 teleports was really tricky. Thankfully, with a lot of trial and error with the layout algorithm it's possible to find a way to draw lines that do not overlap and don't go on-top of any trainers!
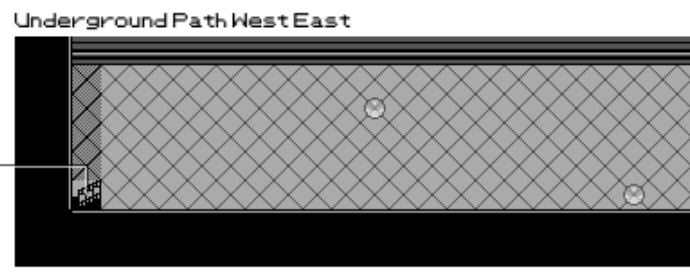
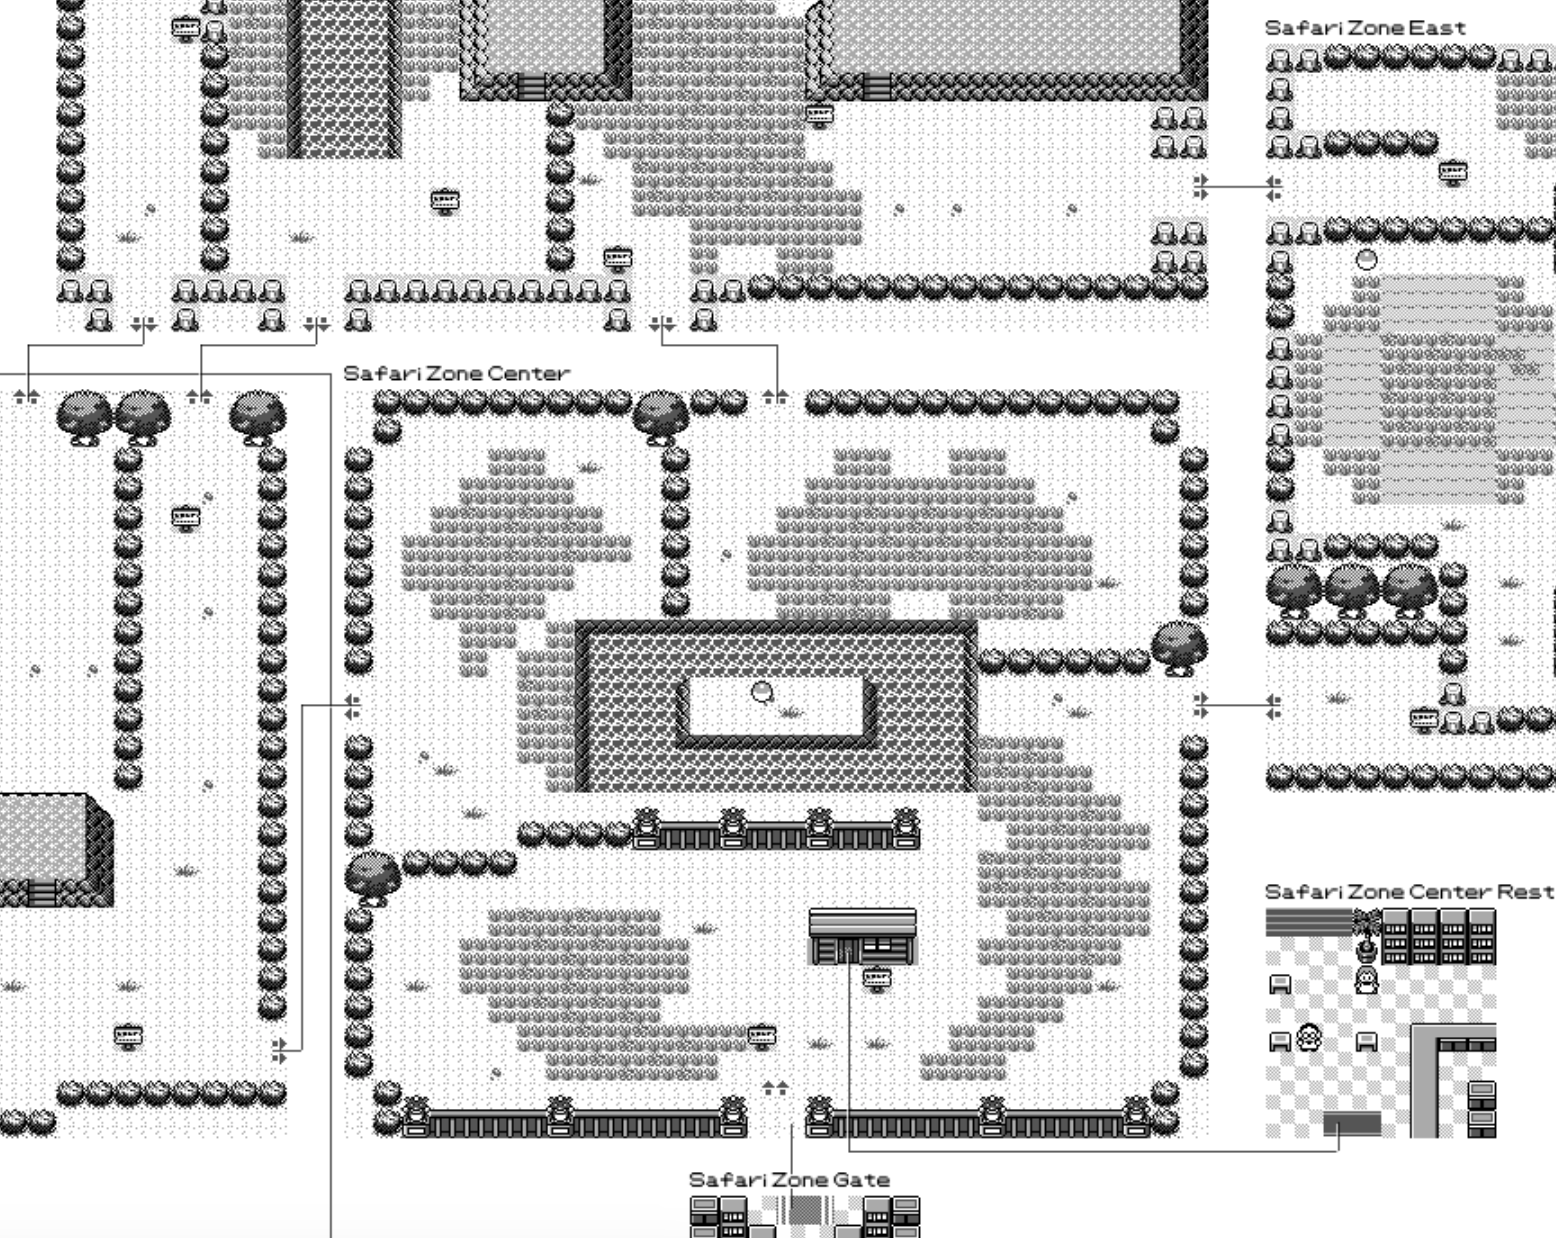
Probably my biggest disappointment doing this project is that Safari Zone is actually not physically sound. It's not possible to layout all the zones in a way that the arrows line up properly. No wonders why I always get so confused as to how to find my way through.
Conclusion
This was a really fun project, it combined my passion for video games and especially Pokemon and my love of programming. I'm planning to print a large version and hang it on my wall somewhere 🙂
You can view the source code and run it yourself on CodeSandbox. I highly recommend CodeSandbox if you want to play around with idea, it removes all the hassle of getting started and configuring your development environment.
Let me know if you spot things that could be displayed better or if you have ideas related to the project. One thing that'd be pretty cool is to make the map interactive, where you can mouse over some grass and it'll tell you what pokemons can spawn and their rates or on a trainer to see their voice lines and what pokemons they battle with.